Making A Frame: Oak
How art is framed is massively important and often neglected. I’ve been quietly getting into framing the last year or two and it’s been an enlightening experience. Far more goes into it than you might imagine, not just from a craft point of view but also aesthetics. The seemingly simple question of how to enhance art without overwhelming it, is a real puzzle and there seems very little written on the subject as a starting point. Professional framers definitely earn their keep.
But I’ve come to be inspired by the Pre-raphaelite approach to frames as conceiving it an extension of the artwork itself, to be considered and designed as an essential part. With this in mind, I’ve wanted to frame my own work.
I thought it’d be interesting to show how one such frame might be pulled together and some of the design considerations.

One.
I work from planed hardwood, in this case oak, using a handheld router to make a profile. The design of a specific profile is fascinating - the idea you can echo forms in the painting itself, or lead the eye of the viewer into the picture, etc. Turning to historic use of different types of frames can help indicate what is likely to be aesthetically pleasing.
I experience some limitations using a simple handheld router, ideally a routing table is better suited to the task and offer more variation of router bits for different profiles. But like all constraints, using a handheld router allows for simple and clean designs.
Here I selected a chamfered inside edge, a triangular line incised around the outer edge, dividing the flat of the frame in two, and then a steeper chamfer on the outer edge. So quite a geometric and weighty design.
Two.
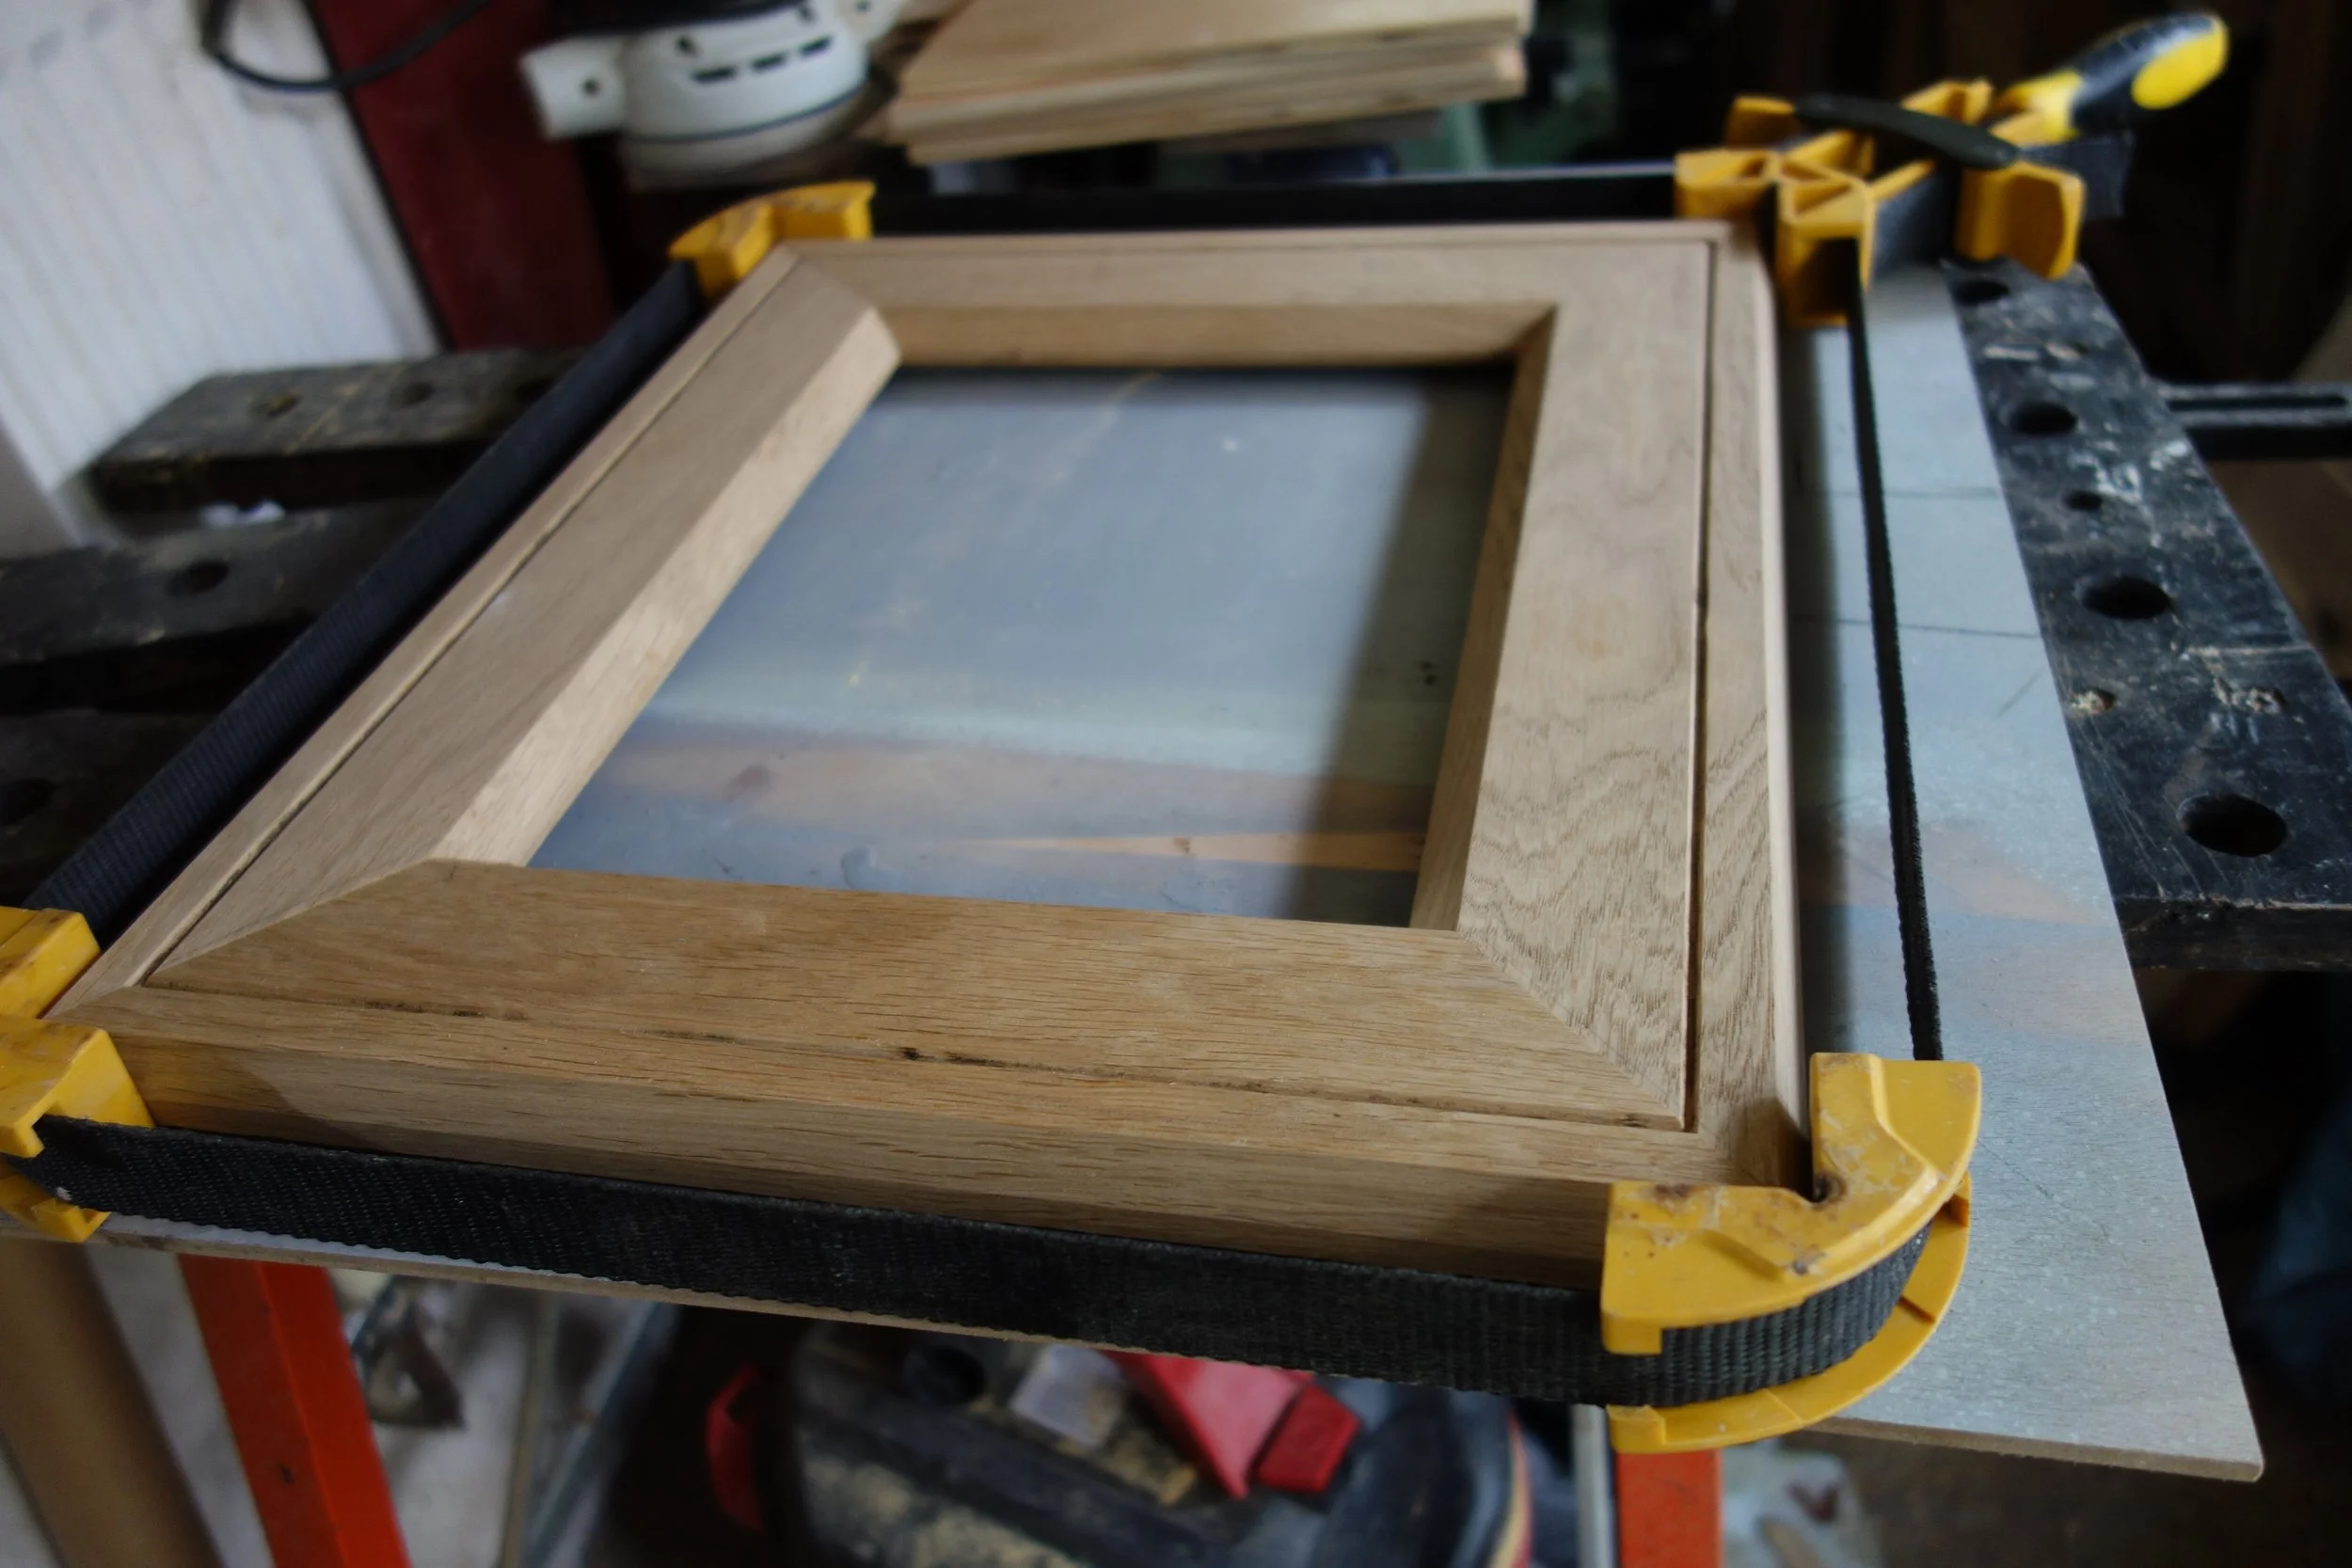
Once the length of wood has been profiled, it is then measured and cut using a Morso guillotine into pieces with perfect (one hopes) 45 degree cuts. I can dry fit the art at this stage to check it all fits.
Once I’m confident the fit is good, the corners can be glued (Titebond III) and placed in a band clamp made for this purpose. This is left for 24 hours to secure.

Three.
A professional framer will usually secure the corners by using an underpinner, a dedicated machine which drives staples across the mitred joint. Equally, some people claim the glue alone provides enough strength.
I opt for a different approach. I use the handheld router again to cut a dado across the joint, inserting and gluing perfectly fitted oak splices which are then trimmed and sanded. I’ll do another post one day about this process in more depth, as I haven’t seen it explained anywhere else.
I love this method because not only does it give a very strong joint, but it’s aesthetically very appealing. They will appear on the side of the frame in the final product. In true Ruskinian fashion it is functional ornamentation that gives the frame a lovely handcrafted feel.
Four.
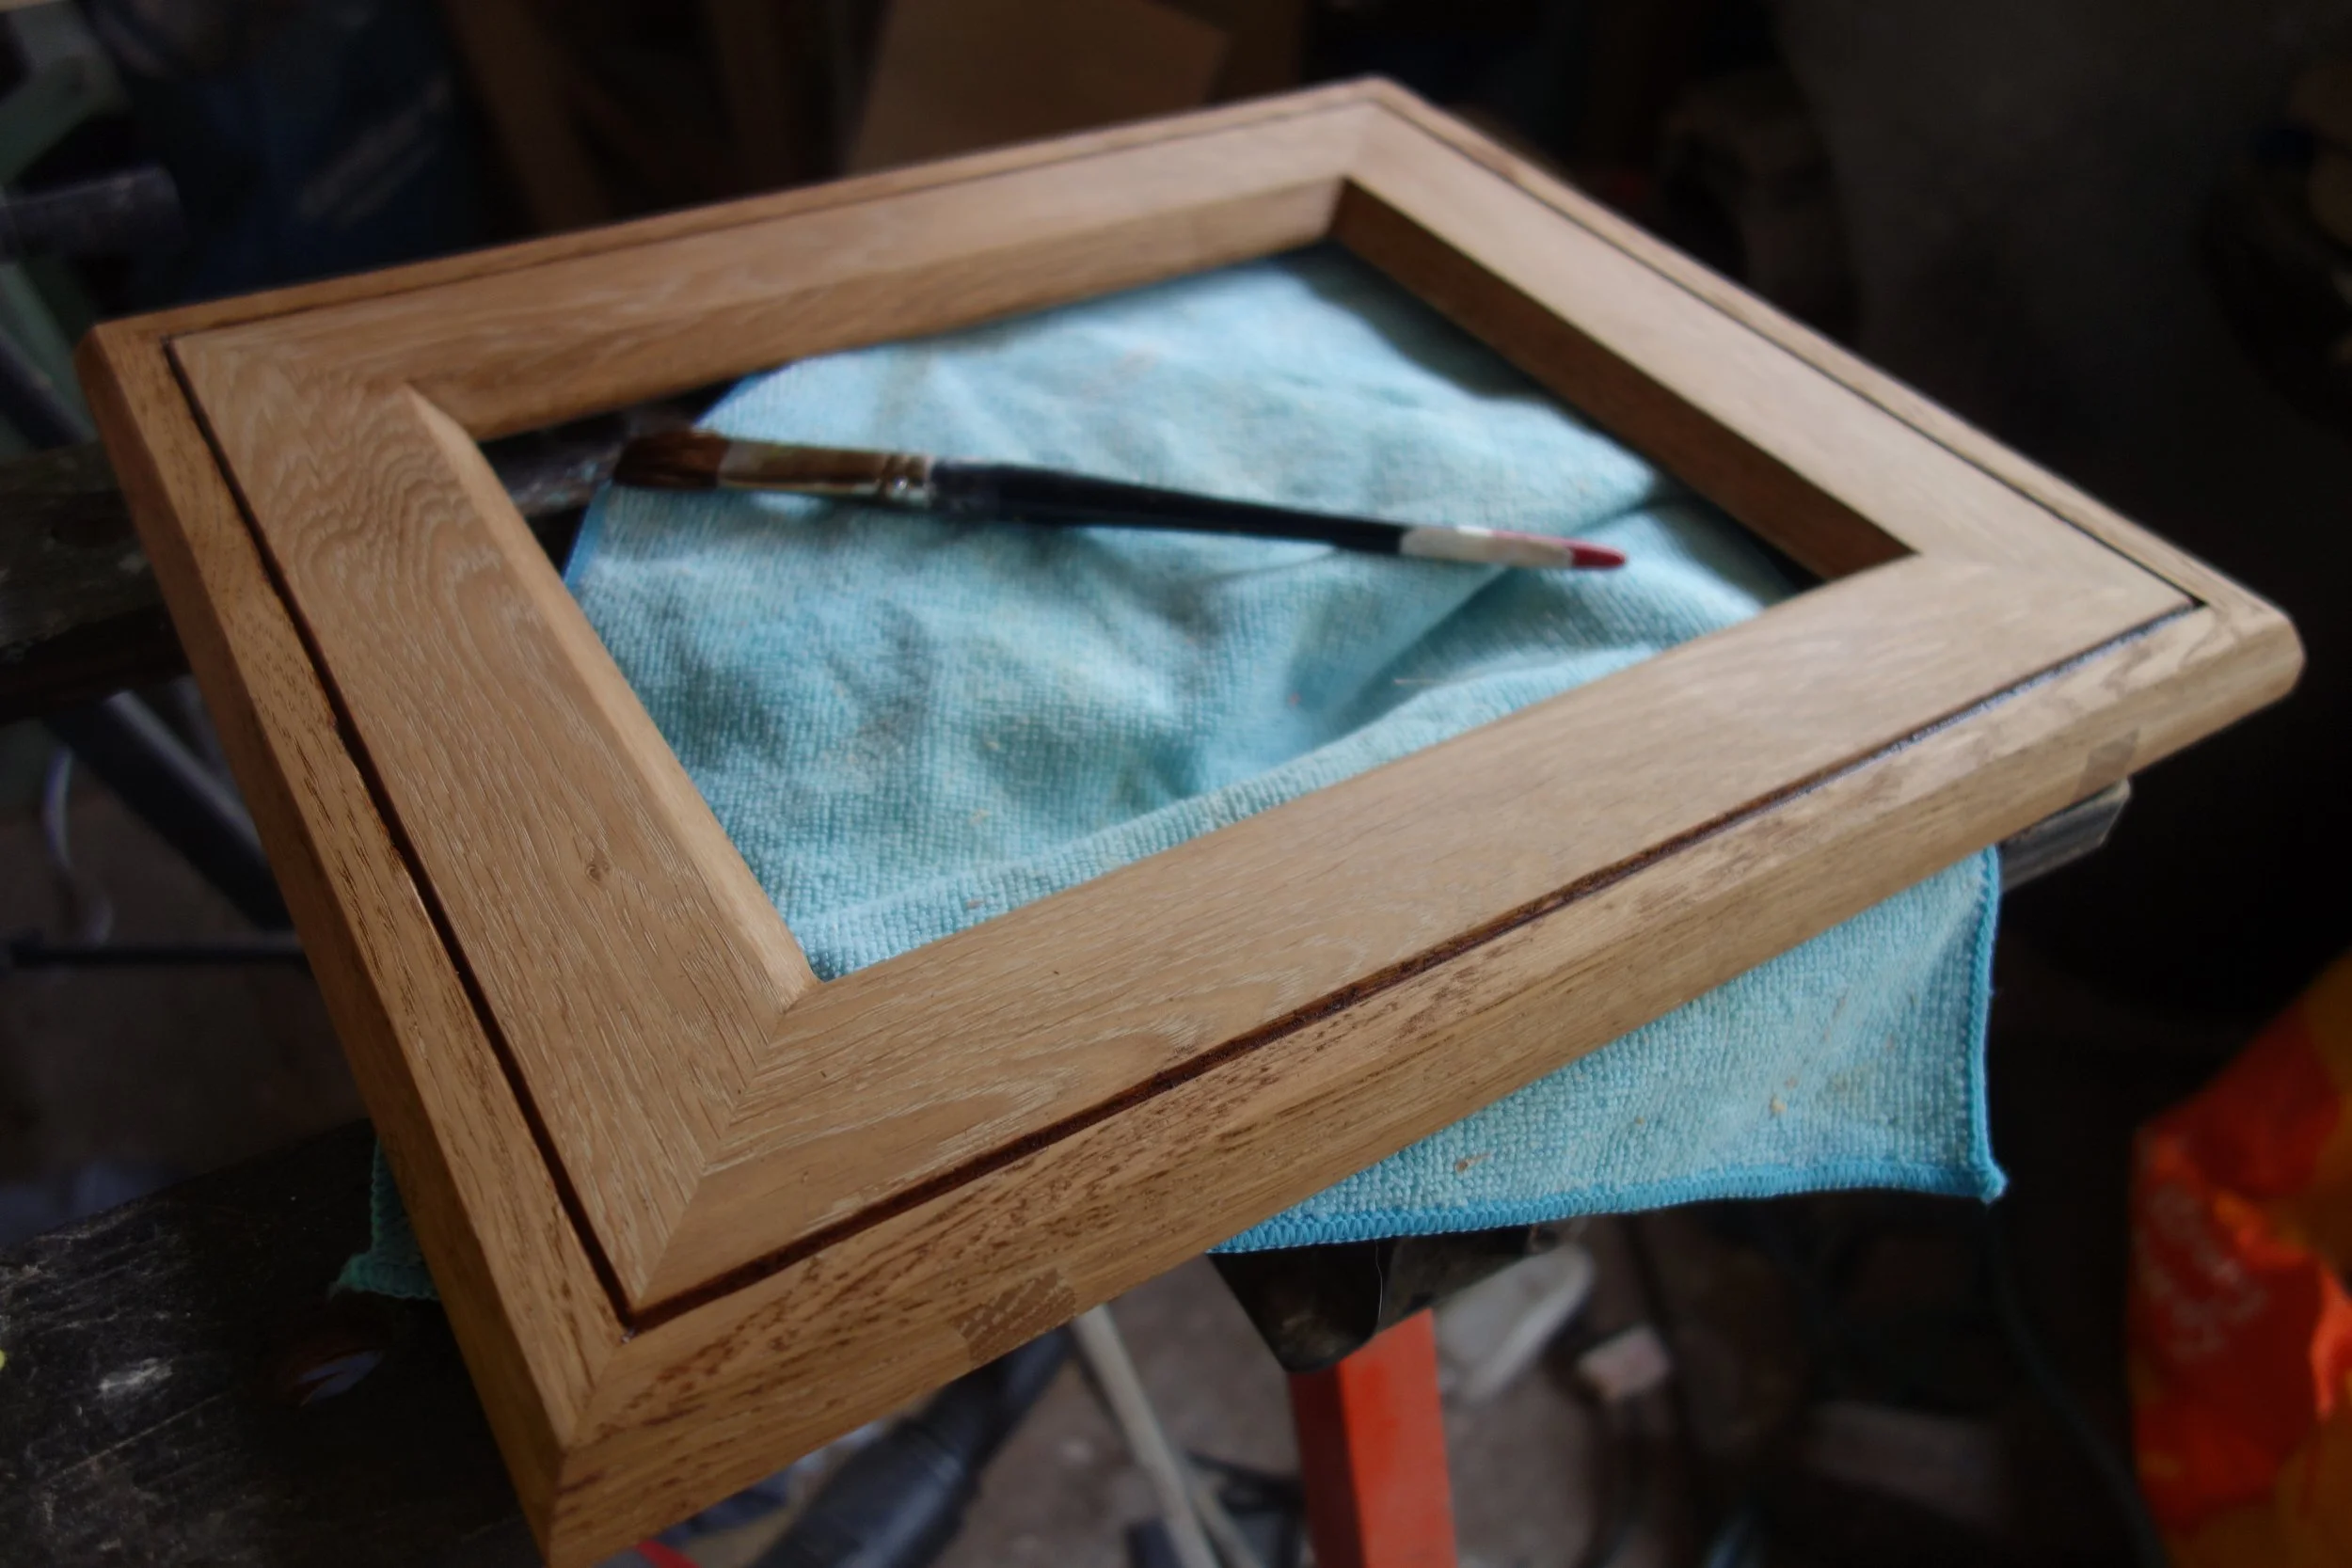
The frame having been profiled, cut, and assembled, can now be sanded and finished. This part of the process is highly variable. Here I opted for a few things:
I filled in the grain on the interior banding of oak. This is to give a bit of variation between the inside and outside edge. You can see how the inside is paler and less grainy.
Then I water stained the whole thing with van dyke brown.
I taped off the “sight edge” (the interior edge of the frame) to protect it from the multiple coats of danish oil applied elsewhere.
At this point, the wood looks absolutely beautiful.


Five.
In the final stages, I choose to apply red bole on which I oil gilded the sight edge. The idea being this draws in the viewers gaze to the piece and adds a sense of luminosity by throwing light into the picture. There are also areas where the red bole pokes through, from a distance this has a similar vibrating effect to broken colour in painting.
It’s hard to tell from the photograph, but I also added red bole to the line in the moulding.
The final piece is, in my opinion, a well made and aesthetically pleasing frame. It’s simple, with quality where it’s needed. The gilding gives it a hint of the pre-raphaelite, and the patterning of the oak grain has a natural beauty of its own. It’s well suited for portraiture or still life.